Showing posts with label cooking. Show all posts

Thursday, July 11, 2013

The Perfect Hard Boiled Eggs--Recipe included!


A hard boiled egg is something that seems oh so simple, but is pretty hard to master. 

Now, if you know me well, you'll know that I HATE egg yolks, so hard boiled eggs are my favorite type of eggs because I can just easily separate the whites from the yolks!


I got a little hungry today but I didn't want to settle for something gross and unhealthy, so I went for hard boiled eggs.
After doing some research, I decided to try this new method out. And boy, did it work like magic!


You see how nicely cooked that egg is? You'll know that it isn't overdone if it doesn't have that nasty grayish greenish ring around the yolk!


I sliced 'em up and just ate them like that! Of course, without taking a few pictures and removing the yolk! Ew!


Looks like a party on a chopping board! They look just like confetti! Love it!


Got just a little too carried away taking pictures of eggs with my brother's magnet letters! Oops!

Now if you're that random person out there who's wondering how I managed to take so many pictures of eggs, I don't blame you. Trust me, I surprised myself too when I realized how much fun I was having and how much time I wasted just by taking pictures!

The "shoot" was actually really easy to clean up, because I took all of the pictures on either a black plastic tray or a wood chopping board! All I did was cut up a few eggs, crumble up the shells and yolks, and have a little fun with them!

And if you've been waiting for it, here's the recipe. I kind of switched things up around with the original recipe and voila! I had it!

Perfect Hard-Boiled Eggs

Ingredients:
-Eggs, however many you need
-Cold tap water
-A saucepan, big enough to hold your eggs and at least 1.5 inches of water
-Ice, if you want to speed up the cooling process

Method:
1. Fill up the saucepan with at least 1.5 inches of COLD tap water, but if you're using a lot of eggs, fill up the pan with as much water as you need to cover up the eggs.
2. Gently, GENTLY place the eggs into the saucepan, making sure you don't crack them.
3. Turn the heat up to high, and let the water and eggs boil.
4. Once boiled, turned the heat down to low and let simmer for 1 minute.
5. Then, turn off the heat and cover the saucepan. Let the eggs cook with the remaining heat for around 12 minutes. However, if you are using more than 4 (I used 4), I advise you to let them sit for a little bit longer in the saucepan. A few extra minutes will NOT cause the eggs to overcook.

Cooling and Handling:
After around 12 minutes, use a slotted spoon to scoop out the eggs. You can then run them under the tap so that they're cool enough on the outside to hold, then put them in a medium bowl. Drop some ice cubes in (I used to medium-sized scoops) and pour some cold tap water into the bowl, enough to at least cover up the eggs 3/4 of the way.
The eggs will be cool enough to peel when all the ice has melted. Enjoy!

Happy baking!


Sunday, May 26, 2013

No Oven Required: Pan-Fried Salmon on Peas

If you're looking for a baking post, this post is definitely not for you!
A while ago, I made this dish: Pan-Fried Salmon on peas. As weird as it sounds, it actually turned out REALLY well--except for the peas part, but I'll go into that later.
The salmon itself was a beautiful cut, and I was able to get a nice, crispy crust on it, but not without a few weird, unusual tricks.


At the start of it all, I planned on just pan-frying the salmon with a bit of salt and pepper, but another thought crossed my mind. What if, just what if I smeared some liquefied apricot preserves over it, then dusted it with some Panko? Now, if you're a chef yourself and are giving me weird looks right now, don't worry, nothing went wrong :)
I was debating rather or not I should do the whole preserves thing, because the salmon was a nice and somewhat expensive cut. However, I also told myself, How would you know that it'd be bad if you don't try it? So I liquefied some apricot preserves in the microwave, and before I threw the salmon into the pan, I used a pastry brush and brushed the salmon with the preserves, and I also sprinkled a teeny tiny bit of Panko over the top. After a while, a beautiful, beautiful crust formed over the top, and I smeared some more preserves over the top as it cooked. I kept doing this until the fish was done.

Aaaandd.....TADA! The fish was BEAUTIFUL, and the top was so crispy and fruity, it was so, so good. Now...onto the peas part....not gonna go into full detail, but basically it didn't turn out very good and was a little icky, so I did have to trash that. Otherwise, the fish itself was miraculously good!


Well, being the naturally big eater that I am, discarding the peas meant losing 1/4 of my lunch, so I had to try out my new Cheese and Curry flavored cup noodles with it. Unfortunately, the noodles were gross as well, so I did have to snack on Oreos later into the day!

Happy baking!

post signature

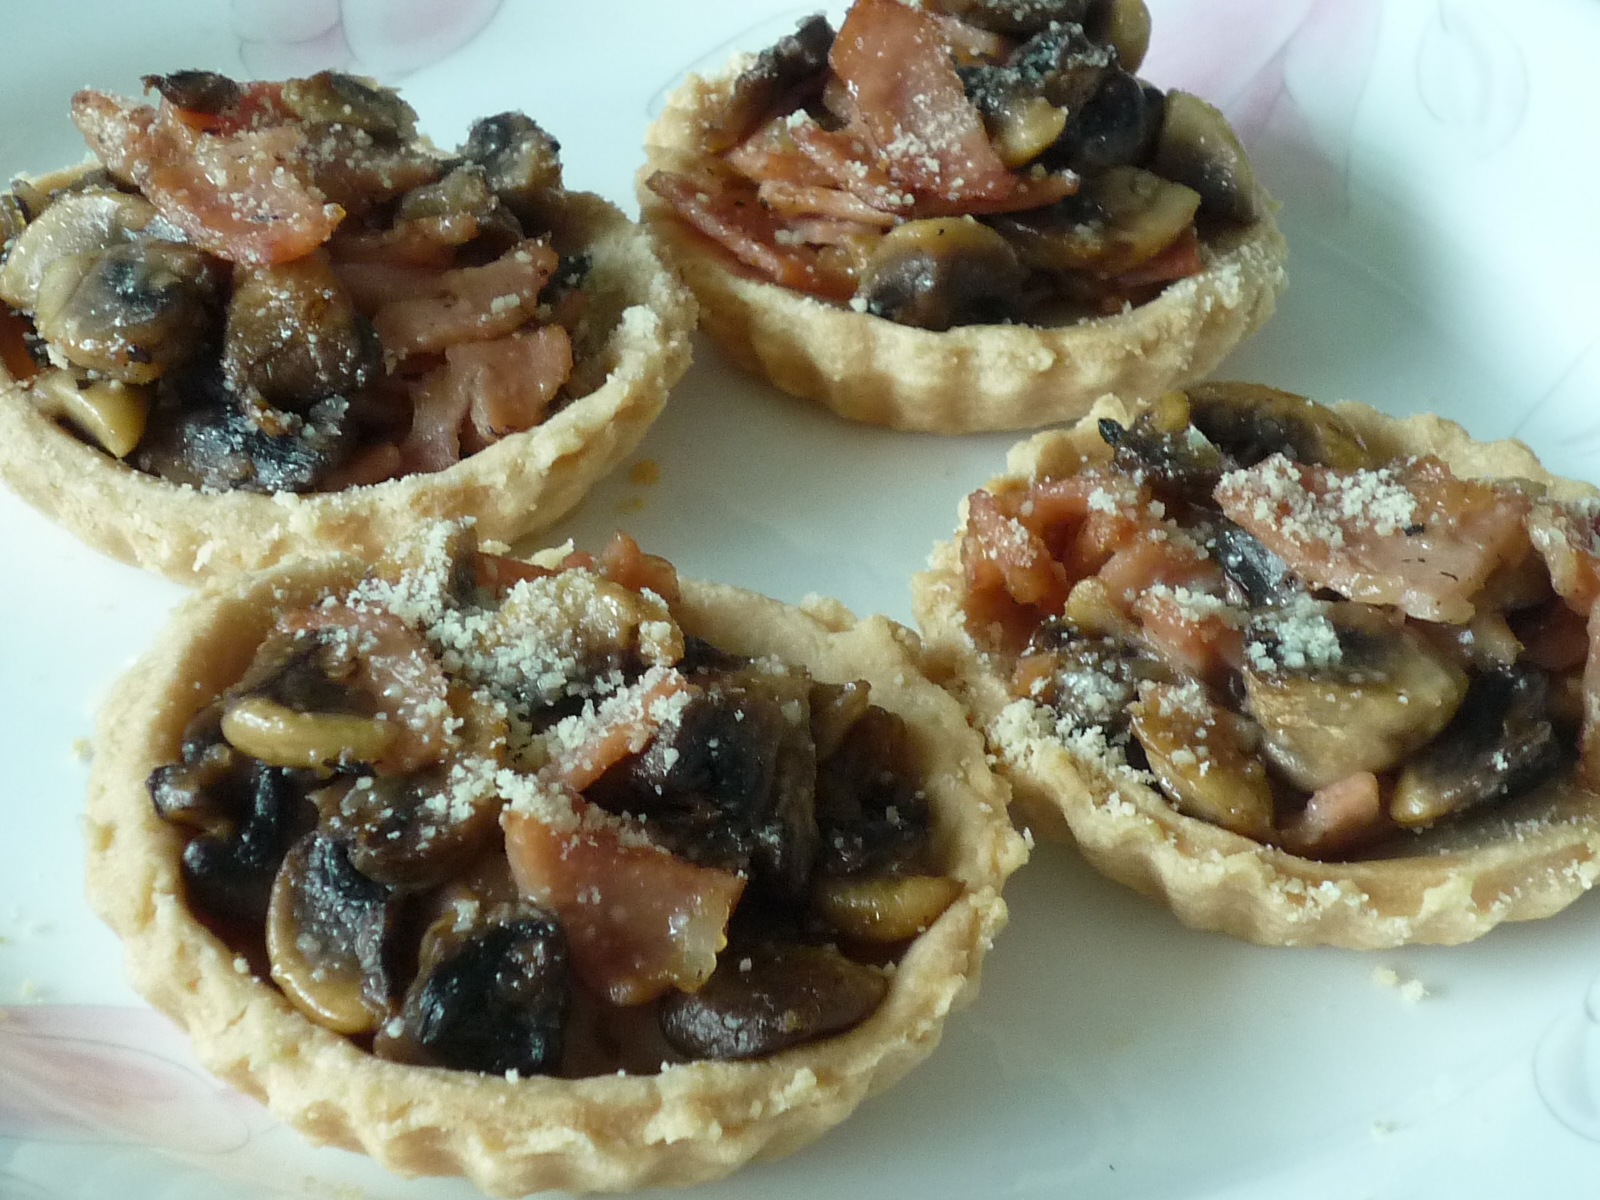
Savoury Mushroom Tarts


While I LOVE making sweet treats, sometimes I do like to look for a change in savoury treats. And although I have to admit I enjoy eating sweet treats more, savoury treats are just as fun to make!
These mushroom tarts were DELICIOUS, and they were surprisingly simple! I also didn't follow a recipe for this. Everything was a product of an experiment, which I might add, a VERY successful experiment!

The tarts were just made from store bought short-crust pastry. Hey, sometimes bakers get tired of following recipes too, so a small shortcut won't hurt :) I simply rolled the pastry out and lined the small tart cases with them, then blind-baked the tarts.

For the mushroom filling, all I did was chop up some button mushrooms and gave them a quick stir in a pan with some oil, garlic, salt, and a bit of pepper I think. Then at the last minute I decided to chop up some ham and put it in too, since I'm naturally a carnivore :) Once the tarts were out of the oven, I spooned the filling into the tarts, and gave them a quick sprinkle of parmesan. I was going to pop them into the oven again, but I got SO hungry I decided just to eat them like that. And boy, were they good! These little tarts were by far THE BEST savoury treats I've made, and I can't wait to make them again this summer!


Happy baking!
post signature