
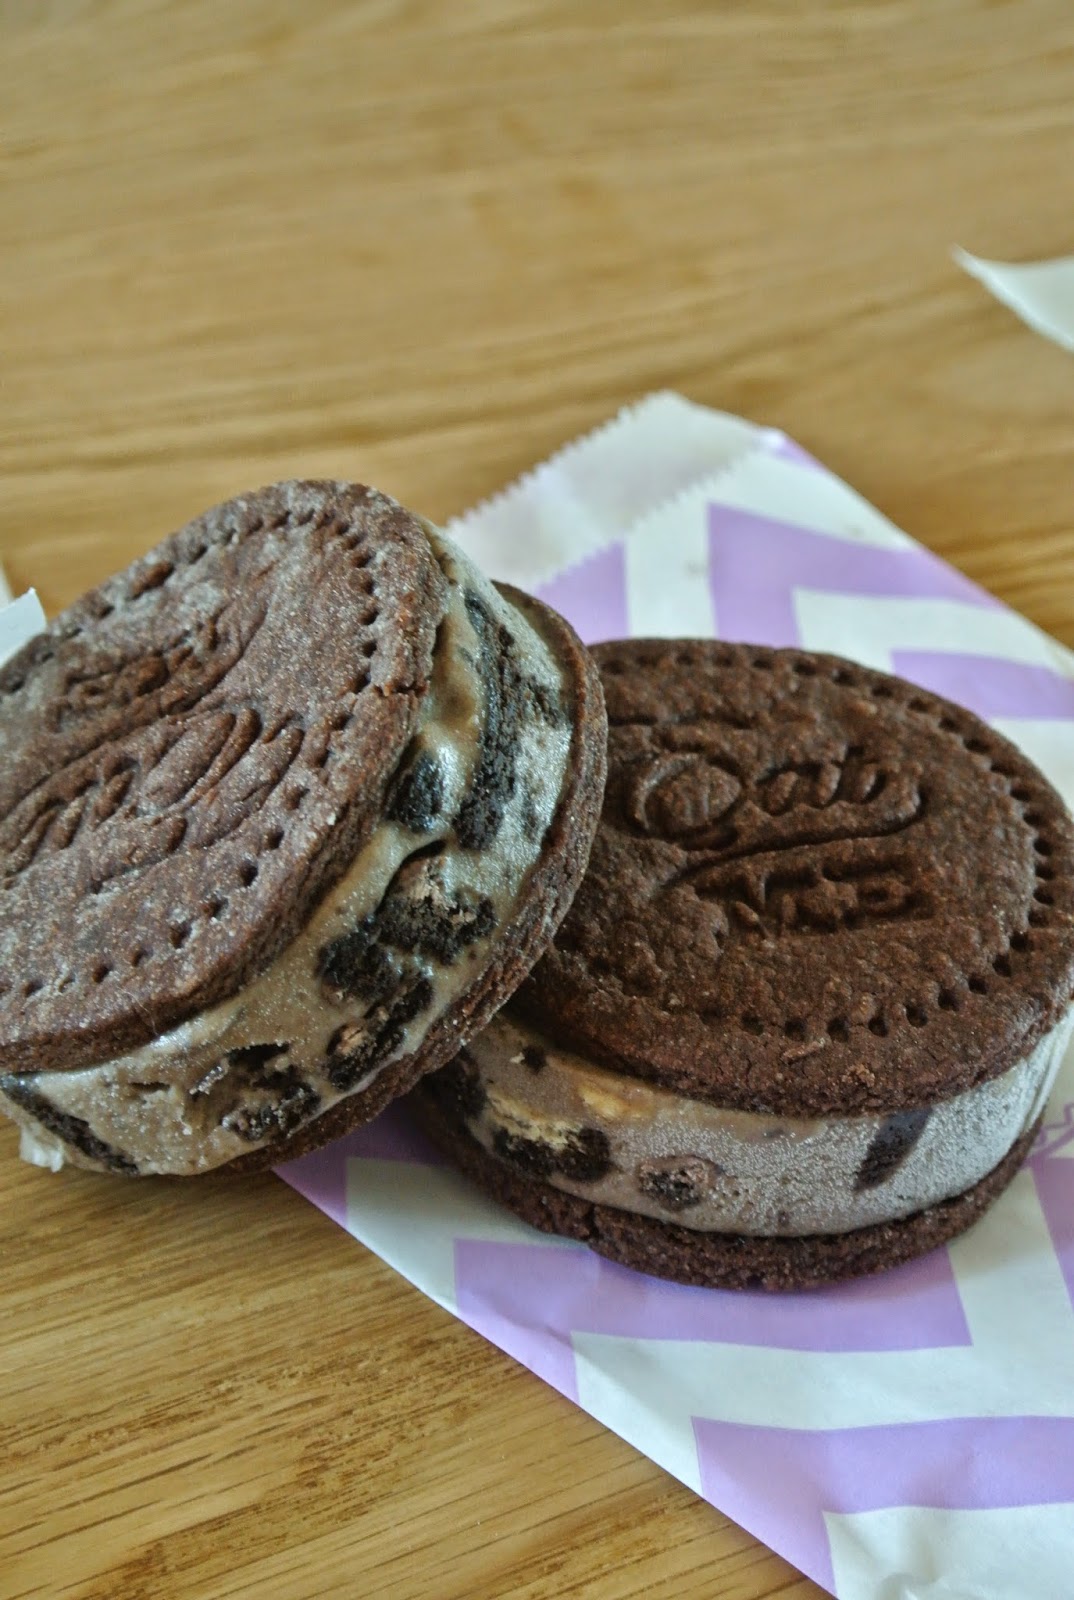
Delightfully smooth and custardy homemade ice cream filled with giant chunks of peanut butter Oreos sandwiched between two chocolate cookies literally screaming for you to dig in. Who doesn't love that?

After a short hiatus, I'm back with the bomb diggity. Literally, THE best thing I have ever made. Probably. From the looks to the taste, this ice cream sandwich is the best thing that's happened to me all summer. Given, summer is over in 5 days (eeek!) and this summer has been utterly uneventful. Ice cream sandwiches rule the world.
I've never been fond of making homemade ice cream just because I don't own an ice cream maker (and can't fit one in my new kitchen at the moment). However, I was watching an episode of Junior Masterchef Australia the other day and saw a handsome young man whip up a magical ice cream sandwich creation. The crazy person in me decided that she'd be able to handle all the ice cream fuss and would like to attempt this daunting task.

It turned out to be nothing out of the ordinary. I wish I had some fantastic tale to tell about me conquering my ice cream making fear but I'm afraid there was nothing interesting enough to share. I followed the recipe to a T, making slight adjustments along the way. Also, I did about a billion taste tests, just to make sure everything was good. That bit I enjoyed the most :)
This recipe began with making a basic, simple custard, which I did rather quickly. Then, I had the time of my life smashing some Oreos to add into the mixture. I did make a rookie mistake, however. I added in the Oreos at the earliest stage, forgetting that I'd have to mix the ice cream several times after that. So, after the first whiz with my hand mixer, the ice cream turned into a light grey color thanks to the Oreos. I will forgive that, though, seeing that grey IS my favorite color :) All I had to do to fix this "problem" was just smash a few more Oreos, this time into bigger chunks, and add them in at the VERY last time I mixed the ice cream before popping it into the freezer for good. It took about 5 or 6 times on the hand mixer, about an hour or so apart each time, before the mixture was set.

I left the ice cream in a 13x9 pan overnight to stabilize so that I wouldn't have a drippy, wet mess when I was assembling the sandwiches! The day after I made the ice cream, I made the cookie dough. It was a simple chocolate cookie recipe, nothing out of the ordinary. I wouldn't say that the cookie is a soft one, but it certainly isn't crunchy either. It's somewhere in a pleasant in-between zone. Right after I cut out the circles, I used my cookie stamp that I got from Typo to leave a sweet little message. I can't find a direct link to it but here is something similar. The cookie stamp SCREAMS me! I love it so much and can't wait to try it out on fondant and other cookies :)

After all the cookies were done and cooled, I stored them in an airtight container and called it a night. As you can see, I don't like rushing things when I bake, so if the treat can wait a day or two, I definitely let it do so.
Assembling them was an easy job, although I did have to work very fast in order to keep the ice cream from melting. You could tell the ice cream was 100% homemade because it melted SO quickly! I cut ice cream rounds with the same cookie cutter that I used for the cookies, threw that on top of a cookie, then put another cookie on top. Easy as pie.

Because I did make several tweaks to the original recipes, I have decided to leave a full-written recipe for you all. It's a rare treat, guys! Usually, I leave links because I'm still very amateur (not to mention busy) and have no intentions of developing my own recipes (yet!), but today I thought I'd be kind enough to write it out :) The recipe is a bit lengthy, but don't worry, a lot of it is just me warning you about some things. The recipe itself is pretty simple.
Enjoy making these sweet treats! They're seriously adorable and can turn any hot, humid (that's to all my Hong Kong peeps), and crummy day into a sweet one! (Treat bag also by Typo. This was a gift several months ago so I do not have a link. However, you can shop more adorable items from Typo here.)

Happy baking!

Classic Chocolate Cookies
Makes about 2 dozen 7-centimeter rounds. Recipe adapted from Brown Eyed Baker.
Ingredients:
1/2 cup softened butter
1 cup brown sugar, tightly packed
1/2 tsp baking powder
a pinch of salt
1/2 cup cocoa powder
2 cups all-purpose flour, divided
4 tablespoons water, divided
Instructions:
1. Preheat oven to 350 degrees Fahrenheit, or 175 degrees Celsius. Line a cookie sheet/tray with parchment paper. If you have multiple trays, line those too, as it would save you time from having to transfer cookies back and forth before baking.
2. In a stand mixer (or hand mixer), cream together the butter and brown sugar. Beat until fluffy and incorporated, about 2 minutes. Add in the baking powder, salt, and cocoa powder, and mix well.
3. Then, add in 1 cup of the flour and 2 tablespoons of the water. Let the mixture come together. Once incorporated, add in the remaining 1 cup of flour and the remaining 2 tablespoons of water. Make sure you let the dough mix around for a while to ensure that all ingredients are thoroughly incorporated.
4. On a floured surface, roll out the dough to about 1/8 to 1/4 of an inch thick. Make sure your rolling pin is also floured beforehand. Cut the dough using a circle cutter, as I have done, or any other cookie cutter you have. Bear in mind that different sized cutters will yield a different amount of cookies.
5. Place the cut cookies on a cookie sheet/baking tray about 1/2 an inch apart. These cookies will not spread too much, if at all, in the oven. Pop that into the freezer for 10 minutes. (You may need to do this at intervals if you don't have enough cookie sheets/freezer space. If you have multiple trays, I suggest using one solely for the freezer, and the other(s) for baking.)
6. Take the cookies out of the freezer and bake for 7-8 minutes. The cookies will look very soft and undone, but they will harden promptly after they are removed from the oven. Let the cookies sit on the hot pan for 1-2 minutes before transferring to a wire rack to cool completely.
7. If making ice cream sandwiches, follow recipe below or use store bought ice cream. Cut out the ice cream with the same cookie cutter you used for the cookie dough. If ice cream is difficult to cut, run the cutter under hot water for a couple seconds. Immediately place the ice cream onto an inverted cookie base, then top with another cookie (right side up) to create a sandwich. Serve immediately, or put in the freezer to enjoy later.
Cookies and Cream Ice Cream (No Machine)
Makes enough ice cream for 12 ice cream sandwiches, if made in a 13x9 pan. Read footnotes for further information. Recipe adapted from Junior Masterchef Australia.
Ingredients:
1 1/2 cups milk, full fat
2 cups heavy cream
2 vanilla beans, seeds scraped out OR 1.5 tablespoons vanilla extract
4 egg yolks (Freeze the whites for later use. Works like a charm and can keep for up to a year!)
1/2 cup plus 2 tablespoons granulated sugar
15 Oreo cookies (5 packages), crushed into large chunks (NOT powder form)
Note: If making with an ice cream machine, follow recipe, but churn and freeze according to manufacturer's instructions.
Instructions:
1. Line a 13x9 pan with cling film. Make sure the film hangs over the sides of the pan.
2. In a saucepan, heat the milk, heavy cream, and vanilla until almost boiling. If using vanilla bean, throw in the seeds AND the pod. If using extract, simply add it in. Then, remove from heat and let cool for a few minutes, making sure to stir periodically to prevent a skin from forming.
3. In a small bowl, whisk the egg yolks and sugar until the mixture is a pale yellow. Slowly whisk the yolks into the warm milk (in the saucepan), taking care to whisk vigorously to prevent the yolks from solidifying. Return the pan to the heat.
4. Cook the mixture on low to medium-low heat until the mixture thickens up a bit and turns into a thin custard. This took about 10-15 minutes for me.
5. Pour the custard into the prepared 13x9 pan. Place the pan into the freezer.
6. After 40 minutes, take the pan out of the freezer. The mixture should have cooled down, but is still completely liquid. With your hand mixer, whiz the liquid ice cream around for about 10 seconds, just to prevent ice crystals from forming. Place the ice cream back into the freezer.
7. After another 40 minutes, mix the ice cream again, then return it to the freezer. Repeat this at intervals: Freeze, Mix, Freeze again. I did about three 40-minute intervals, then two 1-hour intervals. In total, you would need to mix the ice cream at least 5 separate times.
8. You can add the Oreos when the ice cream has become a thick, frosting-like texture. This indicates that your ice cream is good to go. After you whiz it with your hand mixer, lightly fold in the Oreos. Be gentle, as you don't want to crush the Oreos and lose the texture of them. Cover the pan with foil and freeze for at least 6 hours, preferably overnight.
9. To make ice cream sandwiches, follow Step 7 from the cookie recipe above. Enjoy!
Note:
-I made the recipe in a 13x9 inch pan. The ice cream ended up being quite thick, about 1/2 to 3/4 of an inch thick. If you want to make more ice cream cutouts, simply freeze in a larger pan. That would yield a larger quantity of thinner cutouts.
No comments:
Post a Comment