Friday, July 26, 2013

Peanut Butter Chocolate Chip Oatmeal Cookies


Divine.

I think I have mentioned in a previous post that I absolutely HATE eating the stuff that I make. These cookies though.....seriously, if I don't eat 10 of them, I think that's what's gonna be peculiar.

I've always been a sucker for peanut butter, chocolate, and oatmeal, so if you put all of that stuff into one cookie it's basically heaven on earth for me.

The recipe came from, once again, one of my favorite bloggers, Sally from Sally's Baking Addiction. However, because I couldn't find peanut butter cups ANYWHERE (this is the real Hong Kong, you guys), I had to settle for chocolate chips instead. And let me tell you, the results were DIVINE.

*For your viewing pleasure, I have removed the "uglier" cookies from the batch and only took photos of the "prettier" ones.

I can sit all day and eat these cookies while I blog about them. Seriously, these are the epitome of a peanut buttery, SUPER chewy, and dense cookie.

However, I guess cookies really don't like me, because, like the last batch of funfetti cookies I made, I had to trash the first few because they simply wouldn't bake. I just didn't have enough patience to keep adjusting and baking so the foolish little girl in me trashed the first few. My cookie dough was SO dense the cookies wouldn't even spread the least bit in the oven. And I'm not even kidding you. I waited for 12 minutes, staring at the oven from time to time and NEVER did they EVER turn out flat. So from the first batch, I learned my lesson and flattened out the dough for the next couple of batches so that they'd be slightly thinner. 

So thick.

This shoot was actually really difficult for me. I had to move the cookies around/sprinkle oatmeal with one hand while taking photos with the other. And mind you, the chocolate from the cookies often found a "home" in my fingers and I had a super hard time trying not to get the chocolate on the camera!

I would've liked a tad bit more peanut butter in my cookies, but I can't blame the recipe writer because she put peanut butter cups in hers and I didn't! The first few cookies that I baked were just plain PB Oatmeal cookies, but after I tasted them I thought they were a bit bland so I threw in "some" chocolate chips. I guess I did get a little too carried away with the chocolate chips, because I definitely tasted more chocolate than I would've liked (or needed)! The PB really got through in the aftertaste (as well as the oats) so next time, I'm definitely throwing in less choc chips and scooping in more peanut butter!


If you've never had a chewy peanut butter and chocolate oatmeal cookie, these are a must try. I cannot persuade you more. These are HEAVENLY.


As much as I'd like to take credit for this miraculous creation, I have to (once again) give credit to Sally. Seriously, that lady is a genius. I don't know another baker who could create such home baker-friendly recipes that taste so "professional"! Gotta love her.


I beg you to PLEASE try these cookies out. You can find the recipe here. The original recipe calls for Reese's peanut butter cups, so if you can find them, I'd say definitely go ahead and use them!

Happy baking!

post signature

Monday, July 22, 2013

Skinny Peanut Butter Brownies--and recipe!


If there's only one word I could use to describe these brownies, it'd be unreal. These brownies are unreal. Legitimately unreal.


So I do realize that I've been whipping up a lot of "skinny" recipes lately. Not that that's a bad thing or anything. In fact, it's made me realize how smart some people can be. Like Sally from Sally's Baking Addiction. That's where I got this amazing recipe, and Sally is such an innovative baker it's hard not to hate myself for not being a cool as her. 

I have no idea how I didn't make these dainty little squares of chocolatey and peanut buttery delight ages ago. I feel like I've been missing out and those extra calories from the boxed mixes were stupid. Stupid, stupid, stupid.

No, I was not talking about you, skinny peanut butter brownie. You are not stupid. Carry on being your usual delightful self.

Honestly, these brownies were probably the easiest things to make and they were well worth the (not so hard) work. I don't say this lightly. Everything was just zapped up in a blender in a matter of minutes, and voila! the batter came to life! It was just that easy.


Oh, and did I mention what was in these brownies? There's absolutely no flour, no butter, no oil, and no shortening whatsoever. These brownies are packed full of healthy fat free yogurt, unsweetened cocoa powder, and the secret ingredient: whole rolled oats.

These brownies get enough thickening from the oats which were used in place of the flour. They were blended in with the other ingredients and simply ground till they became powder form. Unreal? I told you. 


That feeling you get when you know you don't have to work out after eating a tiny square of these brownies is so reassuring. I like it.


Dear Betty Crocker brownie mix, I love you to death, but these yummy little squares have become your greatest enemy. Good luck trying to win my heart. May the odds be ever in your favor.


Mmmm...on three, can we just say "dreamy"? 

I will leave you with the recipe at the bottom of this post. If you want the original, visit http://sallysbakingaddiction.com/2012/06/10/skinny-peanut-butter-swirl-brownies/ to hear from the mastermind herself! I've edited the recipe to a printable recipe, so if you want to print it out, just click on the words "Printable Recipe" and it will take you there!


Happy baking!

post signature

Skinny Peanut Butter Brownies Printable Recipe

The original recipe asked for 20-25 minutes baking time, but I found that I had to bake them for nearly 35 minutes and they still ended up nearly underbaked. Bake for 20 minutes first, then adjust at 5 minute intervals until the brownies pull away from the pan.
Ingredients:
-3/4 cup creamy peanut butter
-6 ounces low fat/fat free plain Greek yogurt (I used regular yogurt and they still turned out fine)
-1/4 cup skim milk
-1 large egg
-a pinch of salt
-1 teaspoon baking powder
-1 cup granulated sugar
-1/2 cup unsweetened cocoa powder
-1/2 cup old-fashioned rolled oats

1. Preheat the oven to 350 degrees Fahrenheit, 175 degrees Celsius. Spray an 8-inch square pan with LOTS of cooking spray because the brownies will be sticky and soft! 
2. Put all of the ingredients EXCEPT for the peanut butter into the blender. Start with the liquid ingredients at the bottom of the blender first, than gradually fill up with dry ingredients. Blend the mixture until the batter is smooth and the oats are ground up. Occasionally scrape down the sides of the blender to ensure that everything is well mixed. Batter will be thin, much thinner than most brownie batters from boxed mixes or regular full-fat recipes.
3. Pour the batter into the pan, then microwave the peanut butter for 30 seconds. Drop spoonfuls of the peanut butter on top of the brownie batter and lightly swirl around with a sharp knife until the peanut butter is "feathered". DO NOT overmix, as the peanut butter is best left just slightly swirled into the brownie batter.
4. Bake for 20-25 minutes (it took me almost 35, so adjust accordingly). You'll know that the brownies are done when the begin to pull away from the sides of the pan. 
5. Let the brownies cool completely. You can place them into a refrigerator for an hour or two so they'd firm up and cut easier. Cut into 12 (or 16 like I did) and enjoy! 

Thursday, July 18, 2013

Crystal Cake Stand Giveaway from Sally's Baking Addiction!

One of my very, very favorite baking blogs, Sally's Baking Addiction, is giving away a crystal cake stand worth $95 USD! For those of you in Hong Kong like me, that's $737 HKD, which is A LOT! 
Go visit her page http://sallysbakingaddiction.com/2013/07/18/crystal-cake-stand-giveaway/ for more information, and the giveaway ends on July 24th! Hurry and get your entries in! Cake stand ships internationally, so to all the people who read this blog around the world, you, too, can enter!

Good luck! (:
Happy baking/giveaway-ing!
post signature

Wednesday, July 17, 2013

Skinny Chocolate Chip Cookies--recipe included!


I was craving cookies today.

I know, I know, I made some funfetti cookies yesterday. But I just needed some chocolate.

However, I wasn't in the mood to whip up something that used TONS of butter and I just didn't feel like exercising off that fattening butter either, so I decided not to make my go-to chocolate chip cookies. They're just not worth the extra grease.


Instead, I did something I'd probably never, ever do in the past.

I looked up a skinny chocolate chip cookie recipe. 

And let me tell you, not only did I use a skinny chocolate chip cookie recipe, but I probably will be using it for the rest of my life. Sorry Martha Stewart, you're ousted.

Skinny recipes have always appealed to me as "disgusting", "tasteless", and "gross". I'm sorry, but that was just what I'd always thought. If avocado wasn't in the recipe, it'd be stuff like whole wheat flour and sugar substitutes or, even worse, protein powder. Yuck. I'd just rather eat nothing at all than to bite into something that's sweet with strands of veggies or traces of "healthy ingredients" in it.

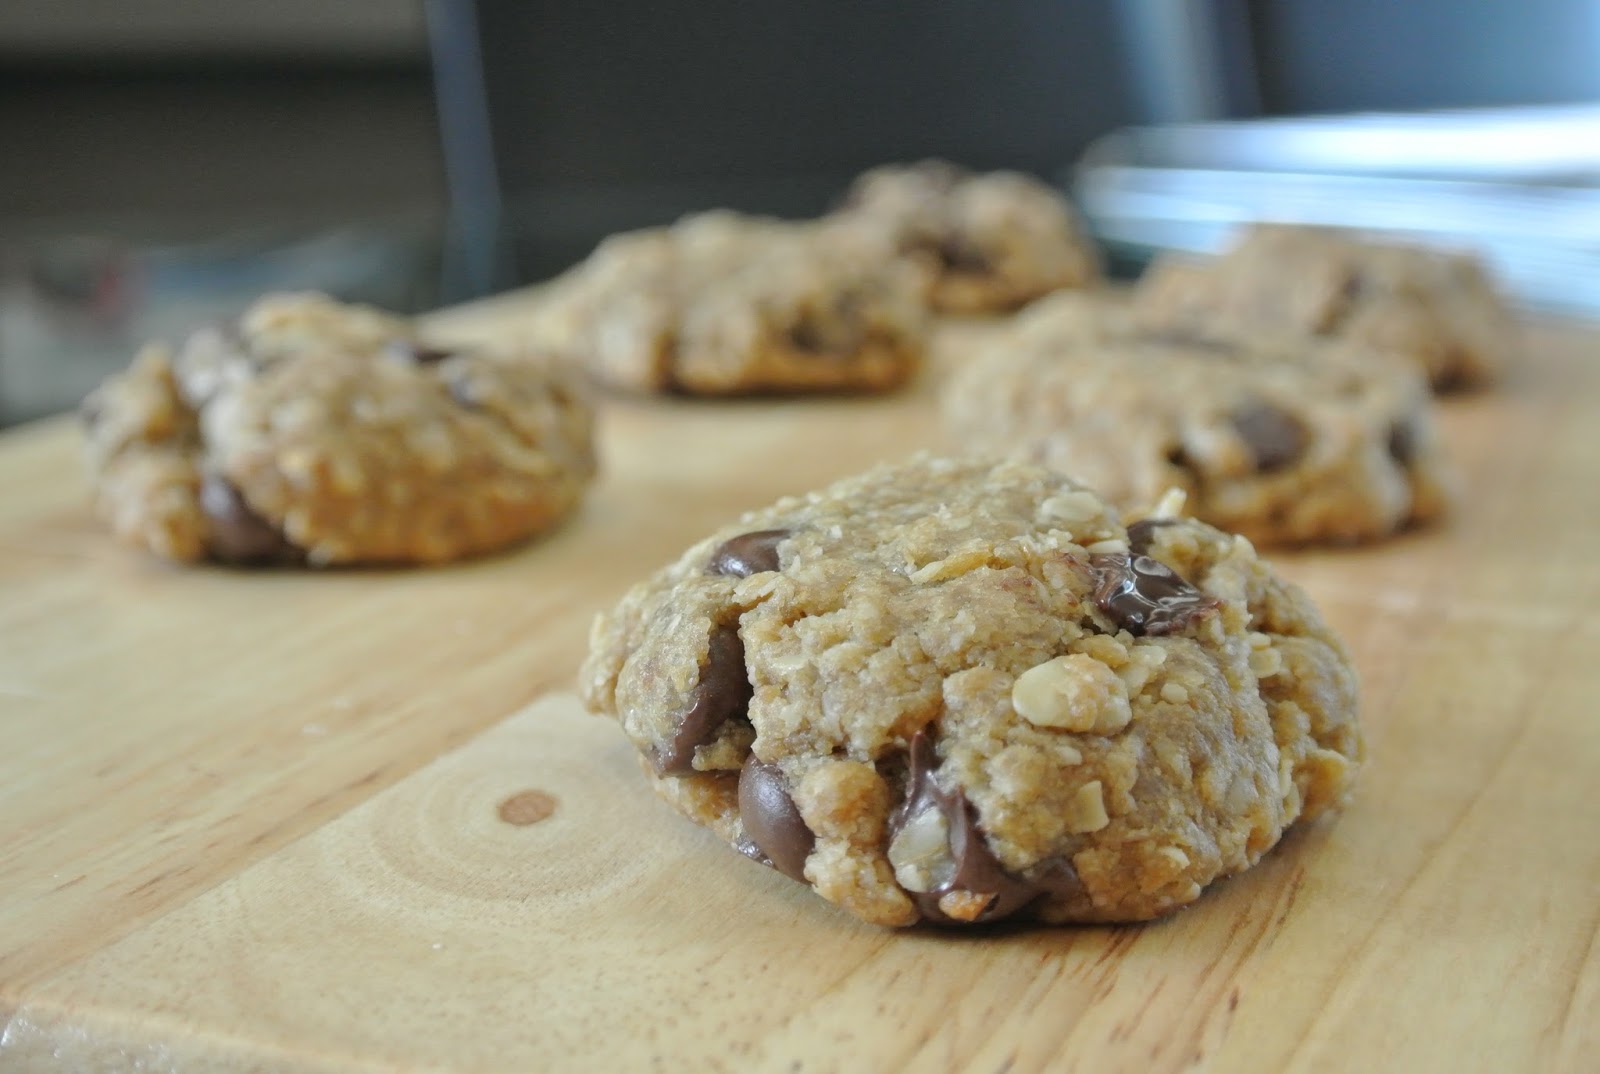
These cookies, however, were different.


They weren't healthy tasting at all, and in fact, I found myself wondering, "Did I put in extra butter?" They were simply that good. They were so good I think from now on I'll be using this recipe whenever the chocolate and cookie craving hits, which is ALWAYS! (Yes, I am pinching myself for starting every sentence with "they". I hate it.)

Let me warn you, though. These cookies are very, VERY tiny and you will find yourself eating tons of them when you're taking pictures for your blog, like I did ;)

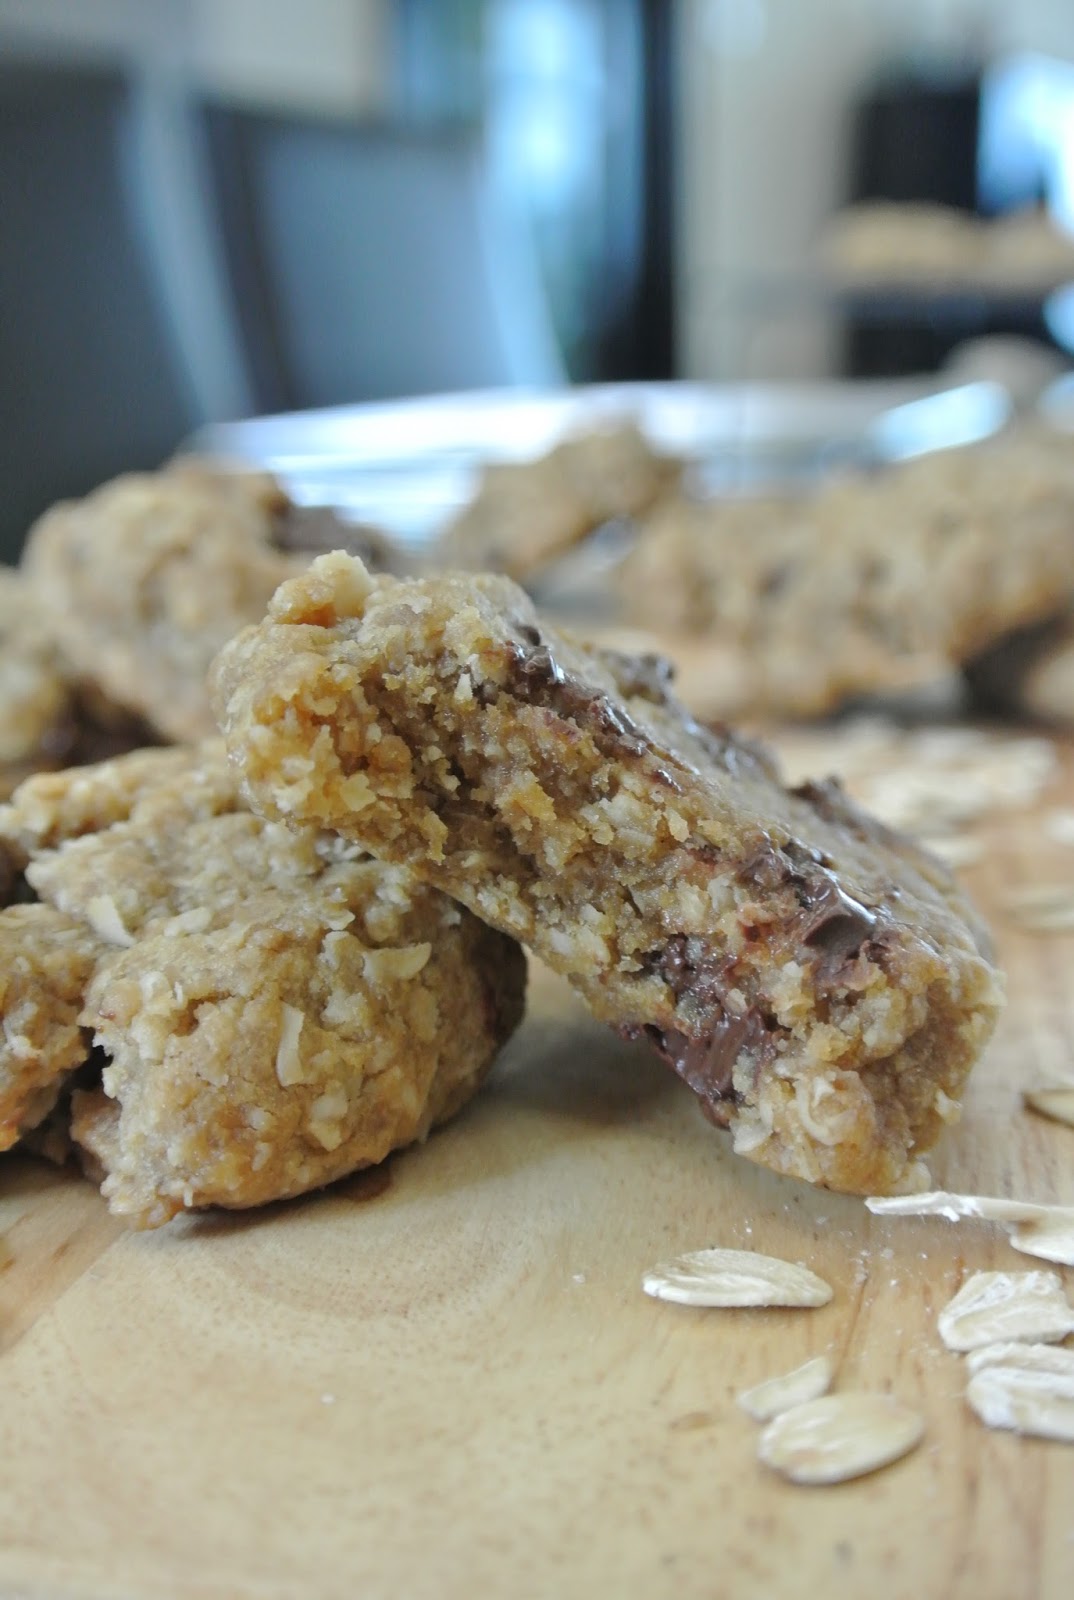
The best part? They're egg-yolk free, nearly butter free, and low in sugar. You'll find yourself guiltlessly enjoying one after another.

The dough was also very forgiving. I actually skipped a step and just went ahead to add in all my other ingredients where as I was supposed to add them in parts, but the dough turned out just fine!

I'm a big parchment paper recycler. I'll always tear off two sheets, bake one of them, and then bake the other one. By the time the second one's done, the first will be cool enough for the third batch. With these, though, they took SO little time to bake and therefore I was bummed I couldn't recycle my parchment :(


And if, if, IF by the end of this post you're still wondering whether these cookies will come out chewy and soft like buttery ones, I can't reassure you any more that yes, they WILL indeed come out EXTREMELY chewy and delicious, just like the full fat ones that are delicious but sinful. 


Now I think I've mentioned this already, but the cookies are TINY. In fact, when placed next to my Nikon 40.5 mm lens cover, it will look just as big (if not slightly smaller) than it. Therefore, if you're a big eater like me, I do recommend doubling the recipe just so you can make them regular sized.

I ended up with exactly 48 cookies, no more and no less. It was the yield amount on the original recipe, so I know I've made mine the right size!


That was a long and wordy post, and at this point you're probably wondering where the recipe is. Fear not, it's right below! The recipe originally came from here, but I've also slightly rewritten it to adjust to my own personal tastes. If you want to give the original recipe a try, which I HIGHLY recommend, definitely do so, but if you trust me enough, you can use mine, which is not at all that different. Don't be scared off by my lengthy instructions, though; most of them are just blabberish, and if you're an experienced baker you can just go ahead and skim past all the words! Enjoy!

UPDATE: I have embedded a printable link for easier access to the printable recipe. Just click on the words "Printable Recipe" below and it will take you there!


Happy baking!


Skinny Chocolate Chip Cookies Printable Recipe

Like I already said, the cookie dough is very forgiving, but the oven time is where things could go wrong. For me, around 6 and a half to 7 minutes was the perfect time, but oven temperatures differ with different ovens, so just check once in a while to make sure your cookies are done to perfection. Also, bear in mind that the cookies will continue to cook as they cool, so make sure you don't overbake them!

Yield: 4 dozen tiny 4 cm wide cookies

Ingredients:
-2 tablespoons SOFTENED butter (I used unsalted, but you can use salted)
-2 tsp oil
-scant 1/2 cup tightly packed brown sugar (original recipe calls for 1/2 cup, but I did cut down a teaspoon or two of sugar and they still turned out on the slightly sweeter side)
-1 tsp pure vanilla extract
-a pinch of salt
-1 large egg white
-3/4 cup all purpose flour
-1/4 tsp baking soda
-1/2 cup semi-sweet chocolate chips (with chocolate chips, the more the merrier, so don't hesitate to add some more!)


Steps:
1. Preheat oven to 375 degrees Fahrenheit, 190 degrees Celsius. Line a cookie sheet with parchment paper and set aside.
2. In the bowl of a stand mixer, cream the butter, oil, and sugar until light and creamy. Add in the vanilla, salt, egg white, flour, and baking soda. Mix the dough on medium speed until well combined. If the dough is too thick, turn off the mixer and stir with a spoon by hand instead (I found this much easier.) Once dough is combined, stir in chocolate chips and mix just so the chips are evenly distributed.
3. Drop the cookie dough onto the lined cookie sheet with a teaspoon, and use about a heaped half teaspoon of dough for each cookie. (see note) Make sure you leave at least 3/4 of an inch between each drop of cookie dough. The cookies will spread a little bit during baking. I ended up with 12 drops of cookie dough on each 13x9 cookie sheet.
4. Bake in your preheated oven for 6 and a half minutes-7 minutes. (see note)
5. Leave your cookies on the cookie sheets for at least a minute, then transfer the piece of parchment onto a cooling rack. When the cookies are cool and hard enough to handle, you can then remove them from the parchment and place them directly on the rack.

Note:
-The recipe yields 48 cookies, and you can easily check if your cookies are too big or too small. If you ended up with around 48, they're the right size. If you ended up with significantly less than 48, that means your cookies are too big. If you ended up with significantly more than 48, that means they're too small. This is not a problem, but you will need to adjust the baking times.

-If your cookies are on the smaller side, I recommend checking on them after 5 minutes, and if they are bigger, I recommend checking on them after 7 minutes. They will be done when the edges are golden brown and the cookies are puffed up. The centers will still be soft, but they will continue to bake as they cool.

Tuesday, July 16, 2013

Giant Funfetti Cookies


I was diagnosed with sprinkle fever, and I can't seem to get rid of it. But I don't mind the least bit (:

Yes, I am aware that I've been baking almost everyday, and yes, I am aware that the lemon bars yesterday were gross, but these funfetti cookies made up for it well.


I've been DYING to try this recipe for ages. Judging from the end result, I'd say I made a good choice. But no, you didn't see the magic that happened behind the scenes. And no, things in fact weren't going so well until the last minute. Legitimately the last micro second.


First of all, I have to say that my cookies turned out NOTHING like the pictures from the original recipe, and I swear I followed the recipe to a T. I did every single thing the recipe stated, including letting my egg rest to room temperature, AND letting my butter sit at room temperature to soften. I normally just warm the butter in the microwave, which I have to say is a much faster way AND I'm amazingly skilled at doing that, but for this recipe I had some extra time so I let the butter sit out.

I was instructed to bake for EXACTLY 8 minutes and no more, so I did that. I was also told that the cookies will look very underdone but they'll further bake with the remaining heat, so I let the cookies sit in the cookie sheet for 10 minutes after baking so they'd continue to cook. And let me tell you, they were COMPLETELY raw even after almost half an hour of resting. 


Now I don't blame the recipe writer. It is terribly hard to get the timings right for a recipe because everybody's oven is different. But I have to say, there was a point where I was about to give up on these cookies. I even trashed a couple of them.

However, I decided to bake them again, well aware of the possibility that they'd be overdone. 

And let me tell you, they would be considered "overbaked" for most people, but to be honest with you, they were in the PERFECT state! Crunchy on the edges, soft and incredibly chewy on the inside! 


The best part was that there were specks of sprinkles (or nonpareils in my case) peeking out from the cookie! 


There were sprinkles mixed in the dough, and MORE sprinkles sprinkled on top. But no, my sprinkle fever isn't cured. At least not yet.


See? I told you there were sprinkles all over.


I was fairly disappointed by the fact that I almost had to bake them an extra 8 minutes, but it was well worth the time! The cookies also spread A LOT during baking, which was completely unprecedented judging by the fact that I refrigerated them for a whole 2 hours. If I knew in advance that they'd spread so much anyways, I wouldn't have wasted all that time :( Better safe than sorry though!


Made 8 HUGE cookies in total. I was "supposed" to make 15, but I did mention earlier that I trashed a few of them. They should've been thicker and smaller, but somehow they just came out HUMONGOUS (not that I mind though)!

I embedded the link somewhere in this post already, but if you want to try these cookies out, you can get the recipe here. Have fun digging in to these sweet, colorful, and GiGaNtIc monsters!

Happy baking!


Monday, July 15, 2013

Not-So-Normal Lemon Bars

This whole confectioners' sugar thing almost made me want to belt out "Let It Snow." Almost.

Spotted anything different/abnormal with these squishy little squares yet?

Yeah, I bet you did. Or maybe you didn't. 


Normally, lemon bars have a buttery pie crust/shortbread type of crust. But do you remember how I baked that cheesecake a couple of days ago? I had LOADS of digestive biscuits left over, and I just didn't want to fuss with making buttery pastry, so I decided to use the same type of digestive base that I used for my cheesecake for the lemon bars.


They turned out pretty well for a first timer. And yes, I have been doing a lot of "firsts" lately. It's not bad to take risks, eh? 

^Stacking fail, LOL.

However, I do only say that it turned out "pretty well" and not absolutely out-of-this-world amazing because of how it tasted.


To be honest with you, I hate eating the stuff I make. I just think that it tastes gross and simply unappealing. But somehow people like it.

There's something different with these bars though. I feel like they really are Gordon Ramsay swear-worthy. They tasted really, REALLY bland, and they were kind of weird and floury in texture.


I think the main reason why these didn't turn out so well was because I added too much flour. At the beginning, I was a little hesitant about the batter and I didn't know what was considered the perfect consistency. The lemon filling just looked too watery (I'm a first timer, I know!) so I threw in some flour. I really had no sense of direction or sanity at that point and I was just doing whatever I wanted.


Does this mean I'm giving up on lemon bars though? No. In fact, I'm going to try 10 times harder to get it right the next time.


Despite the recipe "fail", I had loads of fun taking photos! 

Happy baking!


P.S.: If you're wondering why there's no watermark for these photos, it's because I got so sick of editing and overlaying. I give up. 

Thursday, July 11, 2013

The Perfect Hard Boiled Eggs--Recipe included!


A hard boiled egg is something that seems oh so simple, but is pretty hard to master. 

Now, if you know me well, you'll know that I HATE egg yolks, so hard boiled eggs are my favorite type of eggs because I can just easily separate the whites from the yolks!


I got a little hungry today but I didn't want to settle for something gross and unhealthy, so I went for hard boiled eggs.
After doing some research, I decided to try this new method out. And boy, did it work like magic!


You see how nicely cooked that egg is? You'll know that it isn't overdone if it doesn't have that nasty grayish greenish ring around the yolk!


I sliced 'em up and just ate them like that! Of course, without taking a few pictures and removing the yolk! Ew!


Looks like a party on a chopping board! They look just like confetti! Love it!


Got just a little too carried away taking pictures of eggs with my brother's magnet letters! Oops!

Now if you're that random person out there who's wondering how I managed to take so many pictures of eggs, I don't blame you. Trust me, I surprised myself too when I realized how much fun I was having and how much time I wasted just by taking pictures!

The "shoot" was actually really easy to clean up, because I took all of the pictures on either a black plastic tray or a wood chopping board! All I did was cut up a few eggs, crumble up the shells and yolks, and have a little fun with them!

And if you've been waiting for it, here's the recipe. I kind of switched things up around with the original recipe and voila! I had it!

Perfect Hard-Boiled Eggs

Ingredients:
-Eggs, however many you need
-Cold tap water
-A saucepan, big enough to hold your eggs and at least 1.5 inches of water
-Ice, if you want to speed up the cooling process

Method:
1. Fill up the saucepan with at least 1.5 inches of COLD tap water, but if you're using a lot of eggs, fill up the pan with as much water as you need to cover up the eggs.
2. Gently, GENTLY place the eggs into the saucepan, making sure you don't crack them.
3. Turn the heat up to high, and let the water and eggs boil.
4. Once boiled, turned the heat down to low and let simmer for 1 minute.
5. Then, turn off the heat and cover the saucepan. Let the eggs cook with the remaining heat for around 12 minutes. However, if you are using more than 4 (I used 4), I advise you to let them sit for a little bit longer in the saucepan. A few extra minutes will NOT cause the eggs to overcook.

Cooling and Handling:
After around 12 minutes, use a slotted spoon to scoop out the eggs. You can then run them under the tap so that they're cool enough on the outside to hold, then put them in a medium bowl. Drop some ice cubes in (I used to medium-sized scoops) and pour some cold tap water into the bowl, enough to at least cover up the eggs 3/4 of the way.
The eggs will be cool enough to peel when all the ice has melted. Enjoy!

Happy baking!