Friday, October 25, 2013

Dad's Favorite Banana Bread


I love, love, love this picture up there.

It's my dad's birthday in just 3 days! Since the beginning of last month, he's requested a banana bread. I figured why not! It's his favorite baked good of mine and to be honest, I haven't made it in a mighty long time! *Note: The banana bread translates so much darker on film. It is nowhere near that dark in person.

Don't you just love the pretty pastel flags hanging in the background?

This banana bread recipe is one that is super easy to make and is one that I've used for many years. However, I never ever have the patience for anything. Therefore, I always buy my bananas a very long time (around 2 weeks) before I have to use them.

Once they turn very ripe with lots of black spots all over them, I put them in a gallon sized Ziploc bag and freeze them until I have to use them. I was a bit skeptical about this method at first, but after a while I realized it was much more convenient than using fresh bananas, and I found the texture of the bananas to be even mushier than fresh overripe bananas.


As with all banana related baking recipes, you usually have to mash the bananas. It is no different with this one. However, I found that with frozen bananas, they are much easier to mash. Fresh overripe bananas always still have a bit of texture to them no matter how ripe. On the other hand, frozen overripe bananas are so mushy they just fall out of their peel. It is so much easier to get a smooth, even banana mush mixture with frozen bananas.


A while later, I wanted some chocolate so this happened........
Favoritest brownies ever. 

The recipe is written at the bottom. Because this is a cookbook recipe, I have rewritten it as there is no link to it. 


Happy baking (and Happy Birthday, Dad)!
 photo ScreenShot2013-08-31at55636PM_zps321e12a9.jpg

Dad's Favorite Banana Bread
Prep time: 15 minutes
Bake time: 50-60 minutes
Yields: one 8.5" by 4.5" loaf

Ingredients:
2 cups all purpose flour
3/4 teaspoon baking soda
1/2 teaspoon salt
1 stick (1/2 cup) butter, softened
1/2 cup granulated (white) sugar
1/2 cup brown sugar
2 large eggs
1 1/2 cups mashed over ripe bananas (I used about 4 medium sized)
1 teaspoon vanilla extract

1. Preheat oven to 325F. Grease an 8.5" by 4.5" loaf pan. (If pan size is larger, reduce baking time by 10 minutes)
2. In a medium sized bowl, combine the flour, baking soda, and salt.
3. In a large bowl, beat butter and both sugars on medium speed until light and fluffy. Add the eggs, one at a time, beating well between each addition and scraping down the sides of the bowl occasionally. Add the vanilla extract. Mix well.
4. Add in the flour mixture and mashed bananas alternately. Scrape down the sides of the bowl, then beat until just blended.
5. Pour batter into greased pan. Bake for about 1 hour if pan size is as indicated in recipe (see note if not). If the cake is browning too quickly, cover with foil. It is done if a toothpick inserted into the center comes out clean.
6. Transfer the pan onto a wire rack to cool. Let the loaf cool in the pan for 10 minutes, then turn out of pan onto wire rack and let cool completely.

Note: 
I baked mine in a 9.5" by 4.5" loaf pan, so I reduced the baking time by about 8 minutes. If your pan is larger, reduce baking time by 8-10 minutes. If your pan is smaller, increase baking time for about 5-10 minutes. Make sure to keep an eye on it.

A Little Bit of Life.


A while ago I did a little photo shoot with my favorite little boy ever. This kid....

Sure, not everything in here has to be about baking... (:

A baking post (and recipe!) will come very very soon. I promise.

For now, enjoy these black and white candid photos!


Happy baking!
 photo ScreenShot2013-08-31at55636PM_zps321e12a9.jpg

Monday, October 7, 2013

Reese's Pieces Peanut Butter Cup Cookies


First of all, I DO know that Reese's pieces and peanut butter cups are completely different things...I apologize for the rather misleading title.....

There will not be much text today as I need to pack for camp and these cookies were made in a rush! My good camera also isn't working today, so please pardon the oddly long and bad quality photos!


I finally got my hands on some Reese's pieces (!!!!) They don't sell them in Hong Kong, but I did manage to get 10 bags of them on a recent trip to Thailand (and 6 packs of peanut butter cups)! I decided to make some cookies with them, but my favorite 2 cookie recipe websites both had recipes that required at least 2 hours of chilling, which is time that I simply don't have.

Therefore, I turned to Google, and found this awesome cookie base recipe, which works for any type of add-ins!


After zero chilling, I got supper puffy, soft, and chewy cookies! I must say, these are on the top of my list--definitely one of the best cookies I've ever made! I had one right when it came out of the oven, and oh my goodness, was it good!


This is the epitome of a good, perfect softbatch butter cookie with tons of Reese's pieces and chopped up peanut butter cups! Definitely a peanut butter/chocolate lover's dream!


I will leave you with the recipe, which you can find here (yes I AM in a hurry...you have been warned!)

And yes, I do realize that this is my fourth consecutive cookie post, but hey, there's never such a thing as too many cookies.......


Happy baking!
 photo ScreenShot2013-08-31at55636PM_zps321e12a9.jpg

Monday, September 23, 2013

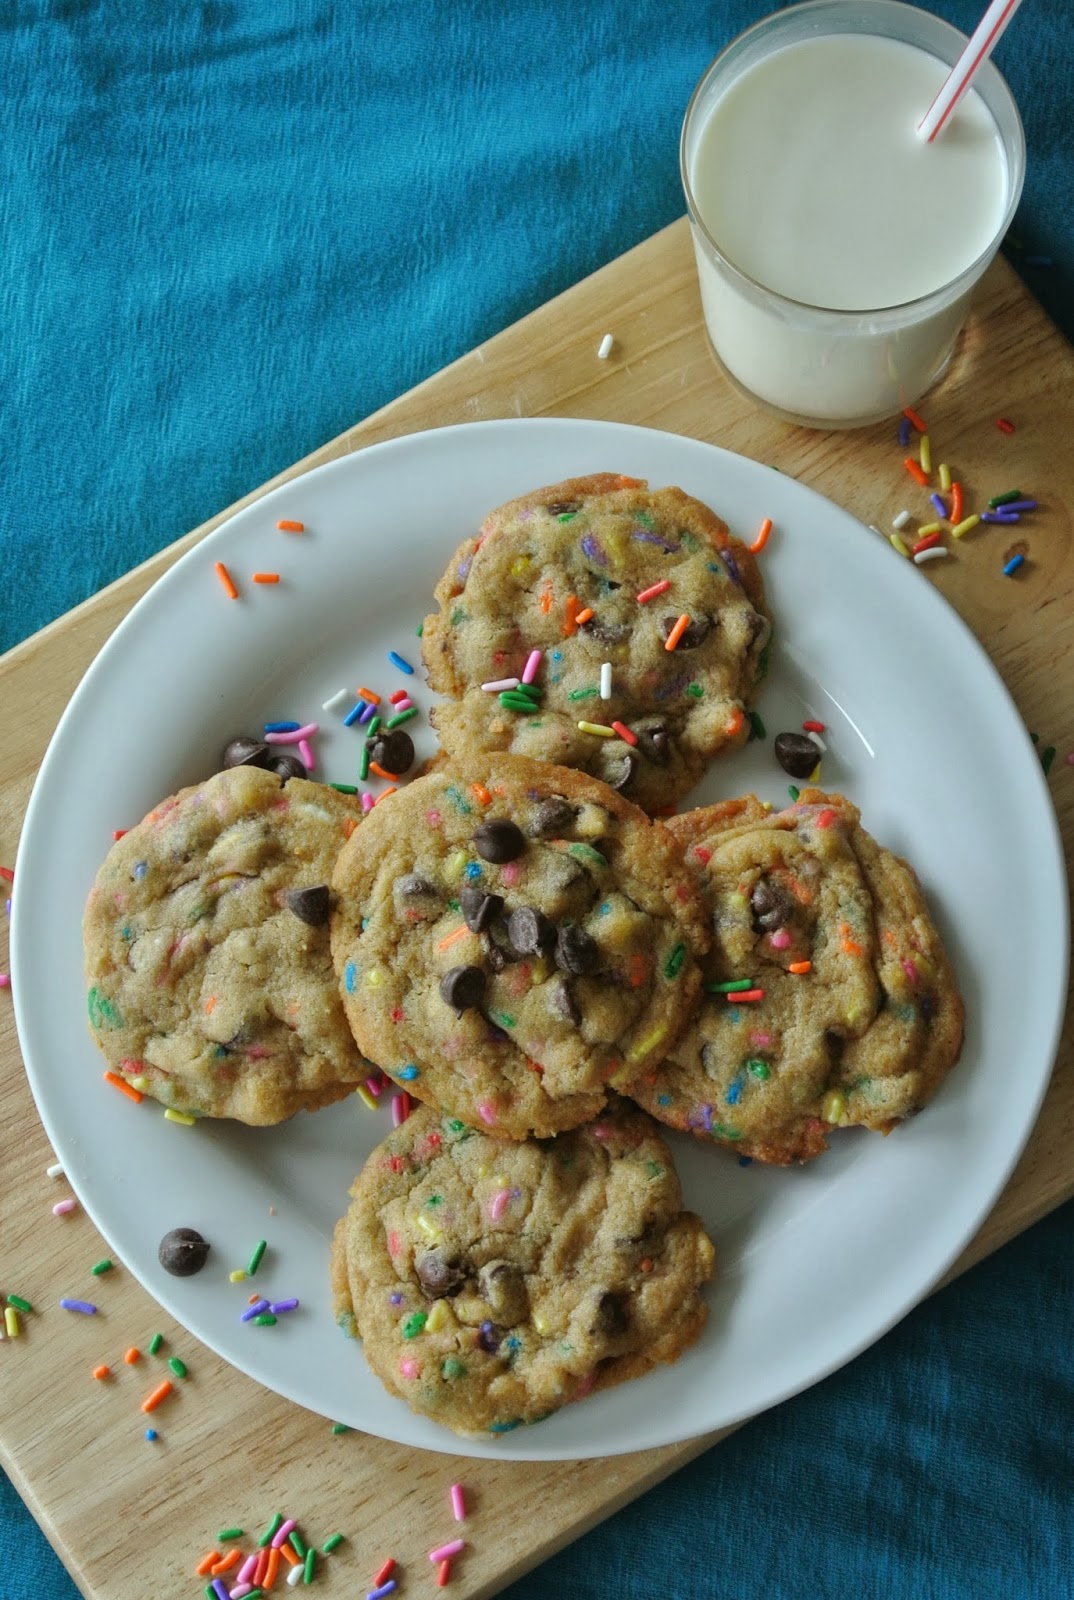
Funfetti Cake Batter Chocolate Chip Cookies


Today's post is fully loaded--long title, lots of pictures, and lots of wind blowing in my face. Okay, not really, but you get the idea. 

Typhoon Usagi hit Hong Kong yesterday and despite my initial cynical predictions, we got a day off of school! Typhoon day always equals baking day. I mean, come on, what do you expect. ;)


Because Usagi decided to grace us with his (his/her?) presence, I figured funfetti cake batter chocolate chip cookies from Sally's Baking Addiction would be fitting for the occasion. I know, I know. Just because.


These gorgeous little gems were a breeze to make (see what I did there? Typhoon-->Breeze....?) They came together in about 5 minutes, and all that was left to do really was just chill, then bake! The ingredients were pretty much normal ingredients you'd find in a cookie--butter, eggs, vanilla, flour, sugar, etc...all but one ingredient: cake mix. I normally don't like cake mix because it tastes.......well......artificial. I mean, come on, it's cake mix. It has to be artificial. Despite how artificial cake mix can be, these cookies don't taste the least bit artificial! The original recipe called for yellow/white cake mix, but I found funfetti cake mix and decided to go for it! The more sprinkles the merrier, right?


The next part was the most crucial part. You have to chill the dough. There are absolutely no exceptions. Unless you want a flat, crispy, gross cookie. I don't want that. Therefore, chilling is mandatory. I don't know how many times I've seen bloggers stress this point, and it is no different for me: Chilling is mandatory. The time ranges from 1 hour to up to 4 days. I simply left it in the fridge, cooked myself some lunch, ate it, then went back to check on them. 

After chilling, your dough should firm up from a sticky mess into a dough that holds together and barely sticks to your hands. Normally, you roll the dough into balls, then bake. However, this recipe is a little different. Instead of rolling into a round (spherical) ball, you rolls them into little sand dunes. To do this, I rolled a heaped tablespoon of dough onto a ball, then rolled it sideways so that it began to stretch vertically. That way, when your cookies bake up, they will be puffier instead of flat.


My first batch of cookies came out a bit flatter than I liked them to, and the edges browned a bit more than I had desired as well. This was not a big problem, though. For the next few batches, I rolled the dough balls even taller so that they'd flatten out less. 

One other word of advice: Use Silpat! I can't believe I just got myself one, but boy, do I love it! Absolutely nothing sticks to it (except for a few melted chocolate chips, ha!) and they help a lot with getting the cookies to bake evenly. I also found it easier to transfer cookies to a wire rack from a Silpat than a piece of parchment paper, so I strongly advise you to get one if you haven't already! **They are pricey, but remember, you will use it again and again.


I really, really urge you to go and make these. They have now become one of my favorite cookies! They're also a great way to use up the legit sprinkles that I finally found after a 6-month quest :) I had to travel all the way to the other side of the city to find them!


You can find the recipe here. Have fun covering your whole house in chocolate chips and sprinkles :)

Happy baking!
post signature

Tuesday, September 17, 2013

Pumpkin Chocolate Chip Cookies

Honestly, when I first saw this recipe, I thought that Sally was bonkers. Turns out, so am I.
I put this on my baking bucket list because I just bought a new can of pumpkin and the recipe seemed adventurously delicious. I don't normally like pumpkin, but I figured I'd give it a try--just because Sally's photos looked so darn good.

There's something SO, so, magical about a jar of cinnamon sticks, and I can't figure out what.....

So anyway, I definitely have to credit Sally for this recipe. I seriously never could've thought of putting pumpkin in a cookie. And no, Hong Kong simply does not admit the existence of fall, so the coexistence of pumpkin and chocolate in one cookie is just unheard of.

Honestly, at first I was very skeptical. I simply had no idea if a pumpkin cookie would taste good. Obviously I'm not very smart because really, today shouldn't be a time of experiment, but I mean come on, these turned out pretty well, right?.........


When the first few of them came out of the oven I could practically smell fall in my house. I literally said that over and over to my brother, who, of course, couldn't care less. There's something about the existence of spices and warm cookies that just brings you this sense of.....of........awesomeness.


*The cinnamon sticks are just there for photographical purposes. No actual cinnamon sticks were used in this recipe.

I took a bit into one while it was still warm, and oh my goodness, that cookie just melted into my mouth and the spices just started to fill the emptiness of my mouth. What's more, it was SOFT and CHEWY. Um.....can we all just say "yes please" and let out a sigh of disappointment at how we're not as awesome as Sally is? This lady is cray!


I cannot think of anything that's better than a warm, spice filled cookie amidst the (not-so-picturesque) fall weather. Of course, Hong Kong spoils everything. It looks nothing like fall here, but ah, the feels when you forget about the place you live in and just dive into fall.


The recipe is here, and make these to your little heart's content :) I promise you won't be disappointed.

Happy baking!
post signature

Saturday, September 14, 2013

Almond Green Tea (Matcha) Cookies


First off, let my start this post by saying just HOW LONG this stinkin photo shoot took me. For goodness sake, I wasted so much time on this that it's not even funny. But no, I'm not complaining.....

Okay, so these little things are pretty self explanatory. Almond meal, green tea powder, eggs, butter, sugar...nothing out of the ordinary. But these cookies weren't an automatic success.


The dough came together in a matter of seconds. Whisk the sugar and green tea powder together, cream that with the butter, add the almond meal and the eggs, and you're done. But it's what came after that that scared me off.


The dough required chilling, which was pretty normal in a sense that these were, in fact, cookies. However, things started to get out of control afterwards.

I rolled the dough up into a log and put it in the fridge to chill for 30 minutes, since that's what the recipe said. (*note to self: recipes aren't always right.)

Then I took them out after half an hour and sliced a dozen for the first cookie sheet. Alright, the slicing was seriously a nightmare. The dough wasn't firm enough and I had zero patience so I just went in with my ultra sharp knife and cut 1/2-inch slices.


I coated them in some normal sugar, then baked them for 12 minutes, since that was the minimum time stated on the recipe. I pulled them out to take a peek and make sure they were done, and they didn't looked cooked. Alright, no biggie, back in the oven.

But I had to do this twice until the cookie tops actually started cracking. I even lifted them up a bit to check the bottoms, and they were just floppy. Back into the oven again, and in all, I had to bake the first batch for a whole TWENTY-SEVEN MINUTES. That's roughly how long it takes to bake a standard sized cake.


I broke one and took a bite--it was cakey. Cakey-ness in a cookies is always a big fat NO. Cake and cookies shouldn't even be combined in one thing. I tossed them into the bin and decided to chill the rest of the dough for a little bit longer, a "little bit" meaning 1.5 hours. 


From then on the slicing was just super duper easy and everything fell in place (yay!). However, baking time-wise....I actually had to bake every single batch for AT LEAST 20 something minutes. That is crazy OUTRAGEOUS for a cookie recipe. And they weren't even a touch overdone. Just kinda hard-ish like a thick green tea cookie should be.


All in all, these cookies turned out well, I'd say. (Well, they have to be--I'm giving them away!) But I'd say the recipe definitely could use some tweaking. 

Next up will be Twix Chocolate Chip cookies, which have been on my baking bucket list for ages. Stay tuned!

Happy baking!

post signature